In this post, we will learn how to put apps to sleep on your Windows 11/10 PC. When your computer is idle, the apps start draining your battery by continuously running in the background. Fortunately, Windows provides several power-saving features, including the Sleep option. The Sleep feature saves your battery life and enhances the overall system performance by putting your computer and apps to sleep after a specific time of inactivity. Here, we will discuss steps to put unnecessary apps to Sleep Mode in Windows 11/10.
Does Windows 11 have a sleep option?
Yes, Windows 11 has Sleep settings you can customize according to your requirements. To do that, press Win+I to launch the Settings app and then move to the System > Power & battery settings. Now, expand the Screen and sleep drop-down option and set up your sleep options accordingly. You can set sleep time for options including On battery power and When plugged in. As per the configured sleep time, your PC will go to sleep when idle.
If you want to put certain apps to sleep and prevent them from running in the background, keep reading this post.
How to put apps to Sleep in Windows 11
To put your apps to sleep and stop them from running in the background in Windows 11, here are the steps you can take:
- Open Settings.
- Go to Apps.
- Click on Installed apps.
- Select the app you want to put on sleep.
- Press the three-dot menu button.
- Choose the Advanced options.
- Set Let this app run in background to Never.
First of all, open your Settings app by hitting the Windows+I key combination. Now, move to the Apps tab present on the left-side pane and then click on the Installed apps option from the right-side pane.
You will see a list of installed apps. Select the app that you don’t want to run in the background and wish to put to sleep, and then press the three-dot menu button associated with it. Next, click on Advanced options.
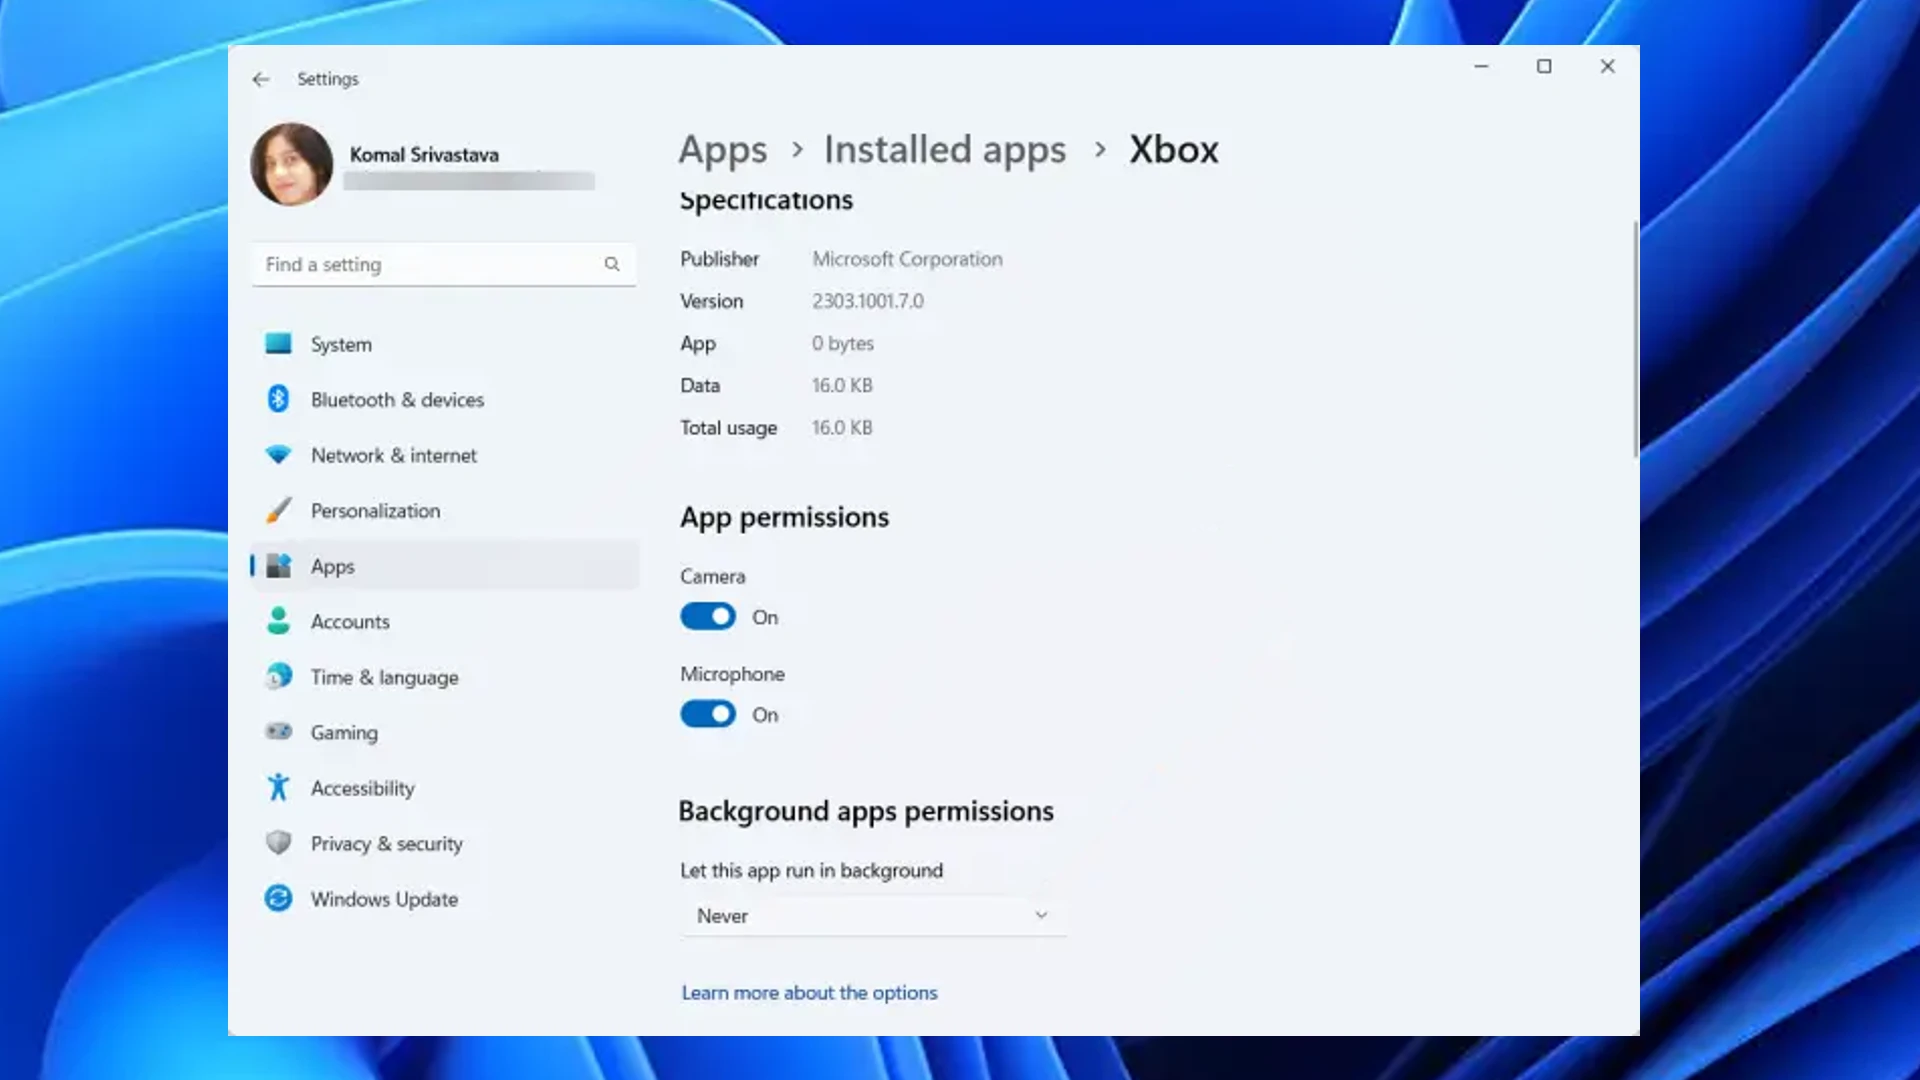
On the next page, scroll down to the Background apps permission section and click on the drop-down button associated with the Let this app run in background option. Finally, choose the Never option. The chosen app will now be put to sleep and won’t run in the background.
In order to put other apps to sleep, you can repeat the above steps for all of them.
How do I make apps sleep on Windows 10?
To put your apps to sleep on a Windows 10 computer, open the Settings app using Win+I and go to the Privacy section. After that, in the left-side pane, scroll down to the Background apps option under the App permissions section and click on it. Now, switch off the toggle associated with the Let apps run in the background option. You can also put specific apps to sleep by turning off the toggle for those apps under the Choose which apps can run in the background section.